如何在 Outlook 中创建和使用签名?
在每封发送或回复的邮件末尾添加签名,不仅展现您的专业礼仪,还能有效提升职场沟通形象。幸运的是,Outlook 为您提供了便捷的个性化签名设置,无需每次手动输入。请按照以下步骤进行设置。
在 Outlook 中创建并使用签名
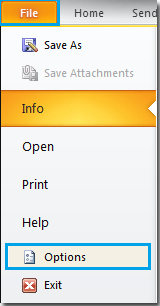
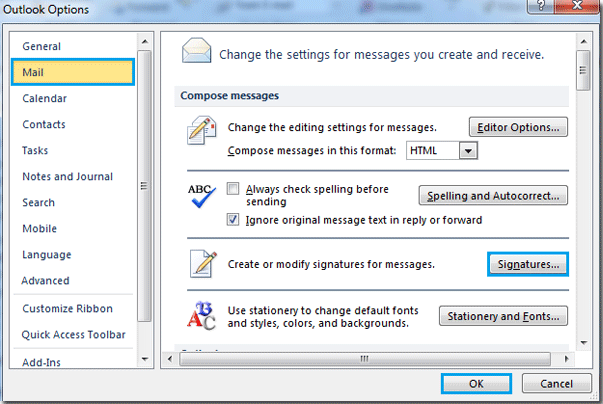
1. 点击文件 > 选项,详见截图:
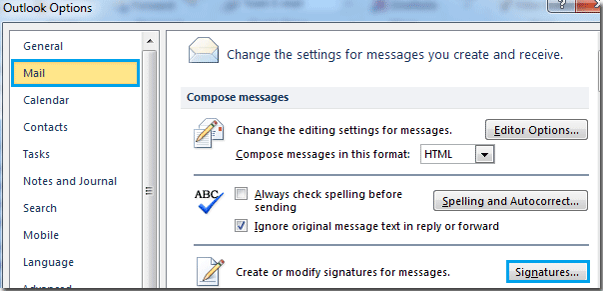
2. 在“选项”对话框中,点击邮件 > 签名。请参见截图:
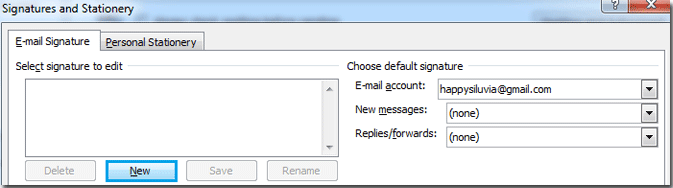
3. 随后会弹出签名和信纸对话框。进入电子邮件签名部分,点击新建按钮。
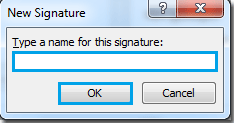
4. 输入签名名称,然后点击确定按钮即可。
5. 为签名命名后,切换至编辑签名区域。在空白处输入您想要的签名内容。您可以添加名片、图片和超链接,让签名更具个性。还可使用文字编辑工具灵活调整文本。完成后,点击确定按钮关闭对话框。
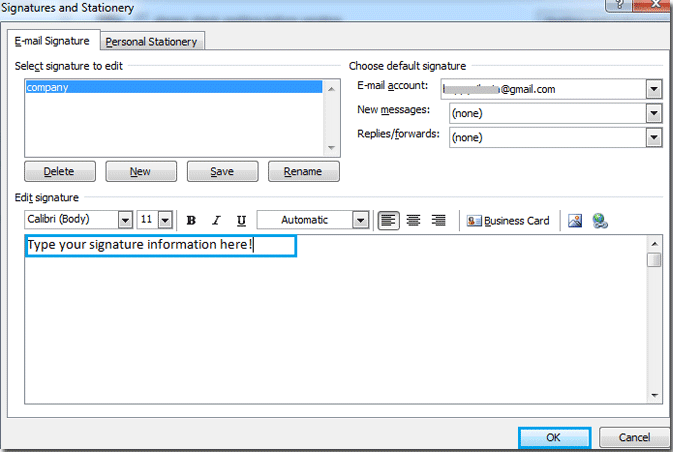
6. 返回“选项”窗口后,点击确定即可完成签名设置。
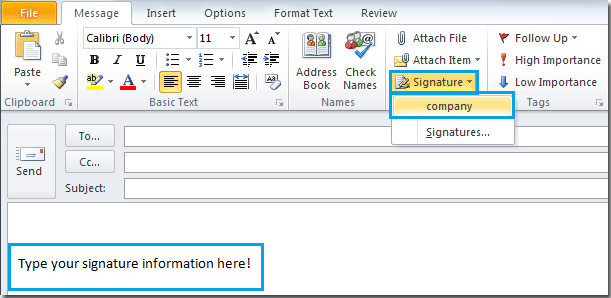
7. 现在,每当您撰写邮件时,签名都会自动显示在内容编辑区。请参考截图:
最佳办公效率工具
体验全新 Kutools for Outlook,畅享 100+ 强大功能!立即点击下载,不容错过!
🤖KUTOOLS AI:采用先进 AI 技术,轻松处理邮件,涵盖回复、摘要、优化、扩展、翻译及撰写等功能。
📧 邮件自动化:自动答复(支持 POP 和 IMAP)/定时发送邮件/发送邮件时按规则自动抄送密送/自动转发(高级规则)/自动添加称呼/自动将多收件人邮件拆分为单独信息……
📨 邮件管理:撤回邮件/按主题等条件拦截诈骗邮件/删除重复邮件/高级搜索/整合文件夹……
📁 附件增强:批量保存/批量分离/批量压缩/自动保存/自动拆离/自动压缩……
🌟 界面魔法:😊更多美观时尚表情/重要邮件到达时提醒您/最小化 Outlook 而不是直接关闭……
👍 一键精彩功能:带附件全部答复/反钓鱼邮件/🕘显示发送者当前时间时区……
👩🏼🤝👩🏻 联系人与日历:批量从选定邮件中提取添加联系人/将联系人组拆分为个人组/移除生日提醒……
在您的首选语言中畅享 Kutools —— 支持英语、西班牙语、德语、法语、中文等 40 多种语言!
一键解锁 Kutools for Outlook,告别等待,立即下载,让效率倍增!


🚀 一键下载 — 即可获取全部 Office 加载项
强烈推荐:Kutools for Office(5 合 1)
一键下载五个安装包,即可同时获得 Kutools for Excel、Outlook、Word、PowerPoint 和 Office Tab Pro。立即点击下载!
- ✅ 一键便捷:只需一次操作,即可下载全部五个安装包。
- 🚀 轻松应对各类 Office 任务:随时按需安装所需插件,助您高效办公,不容错过!
- 🧰 包含:Kutools for Excel / Kutools for Outlook / Kutools for Word / Office Tab Pro / Kutools for PowerPoint